Appearance
Invoice Ninja
Invoice Ninja is an open source platform designed for freelancers and businesses to create, send, and manage invoices. It offers features such as customizable invoice templates, online payments, expense tracking, time tracking, and a variety of integrations with payment gateways and other tools. With Invoice Ninja, users can also handle quotes, proposals, and have a client-side portal for account management. It's known for its simplicity and ease of use, allowing users to streamline their invoicing and payment processes.
Key features of Invoice Ninja:
- Customizable Invoice Templates: Personalize invoice layouts and designs.
- Online Payment Processing: Integrates with multiple payment gateways for easy payments.
- Expense Tracking: Tracks and categorizes business expenses.
- Time Tracking: Records time spent on projects or tasks.
- Client-side Portal: Clients can view invoices and payment history.
- Quotes and Proposals: Create and manage quotes and proposals.
- Multi-Currency Support: Handles invoicing and payments in various currencies.
- Recurring Invoicing: Automates sending invoices on a set schedule.
- Reporting Tools: Provides detailed financial reports and analysis.
- Mobile App Access: Manage invoices via mobile devices.
Further information
Read more detailed information on Invoice Ninja here.
Triggers:
- New clients: Triggers when a new client is added.
- New credits: Triggers when a new credit is added.
- New invoices: Triggers when a new invoice is added.
- New payment: Triggers when a new payment is added.
- New projects: Triggers when a new project is added.
- New quotes: Triggers when a new quote is added.
Actions:
- Create client: Creates a new client.
- Create invoice: Creates a new invoice.
- Create payment: Creates a new payment.
- Create product: Creates a new product.
Connect with Invoice Ninja:
Log into your Invoice Ninja account.
INFO
You need a paid account to be able to create and see API Tokens. Invoice Ninja offers a free 14 day trial phase.
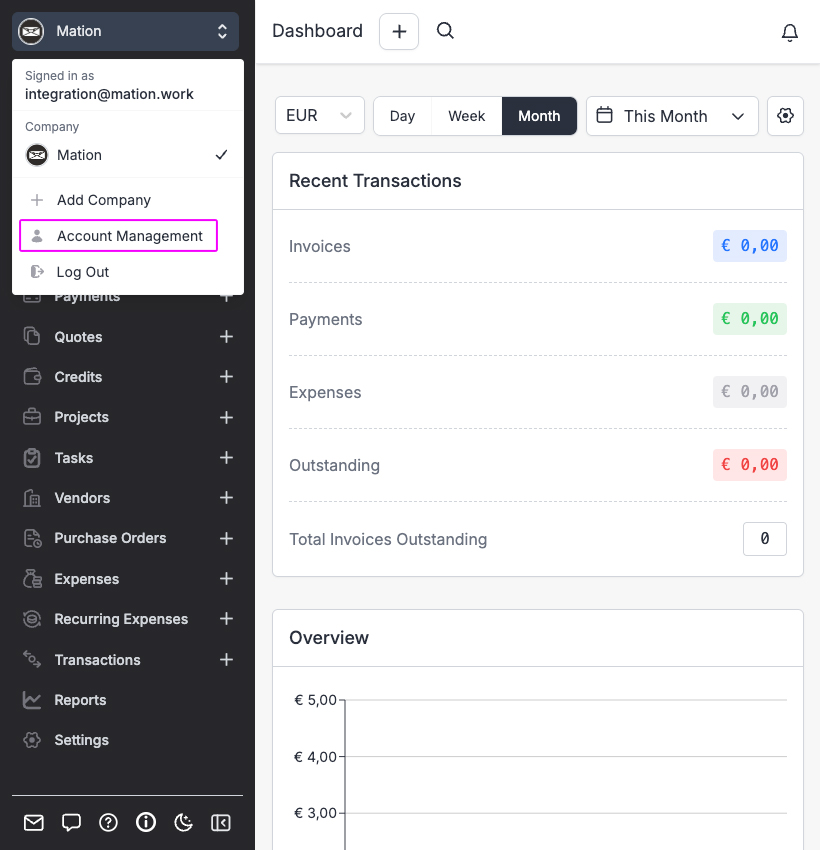
Click your account name in the top-left corner, then select Account Management.
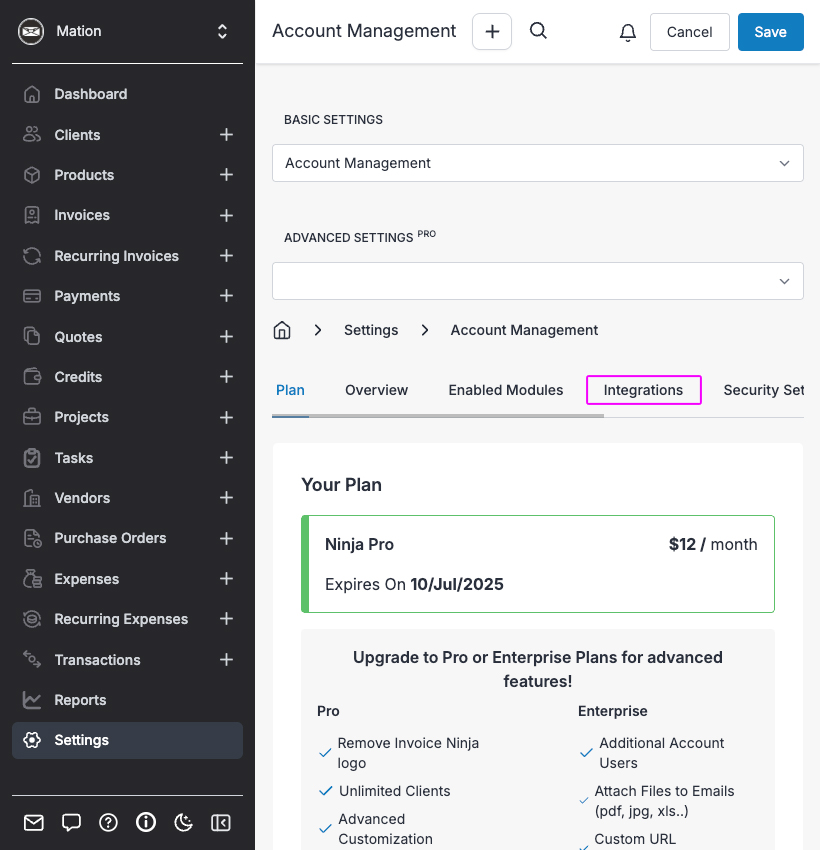
Navigate to the Integrations tab.
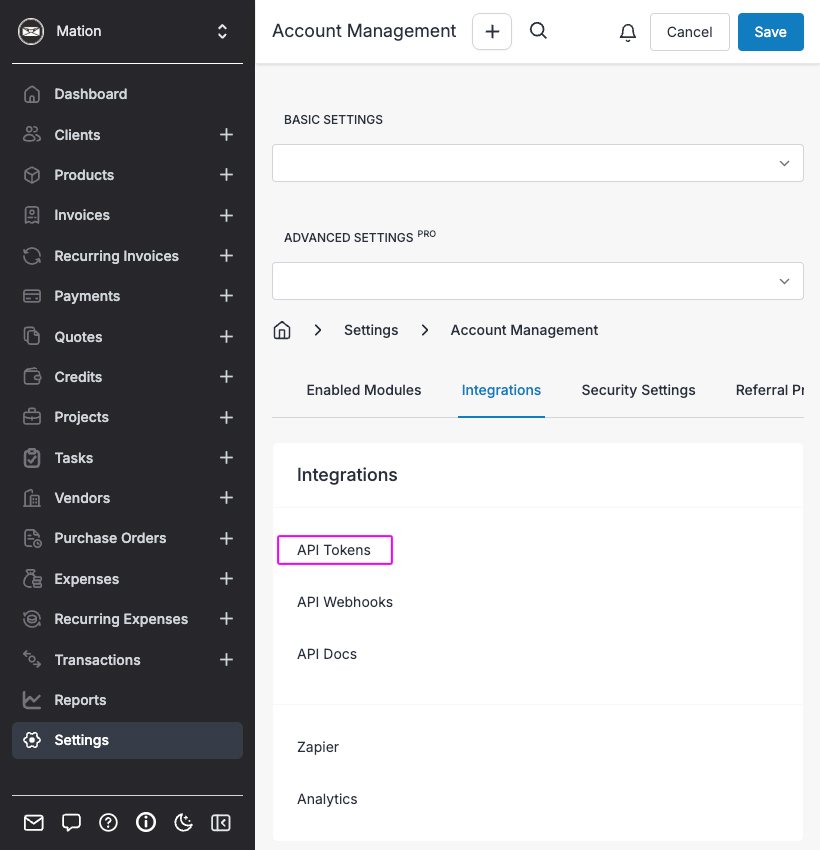
Click the API Tokens button.
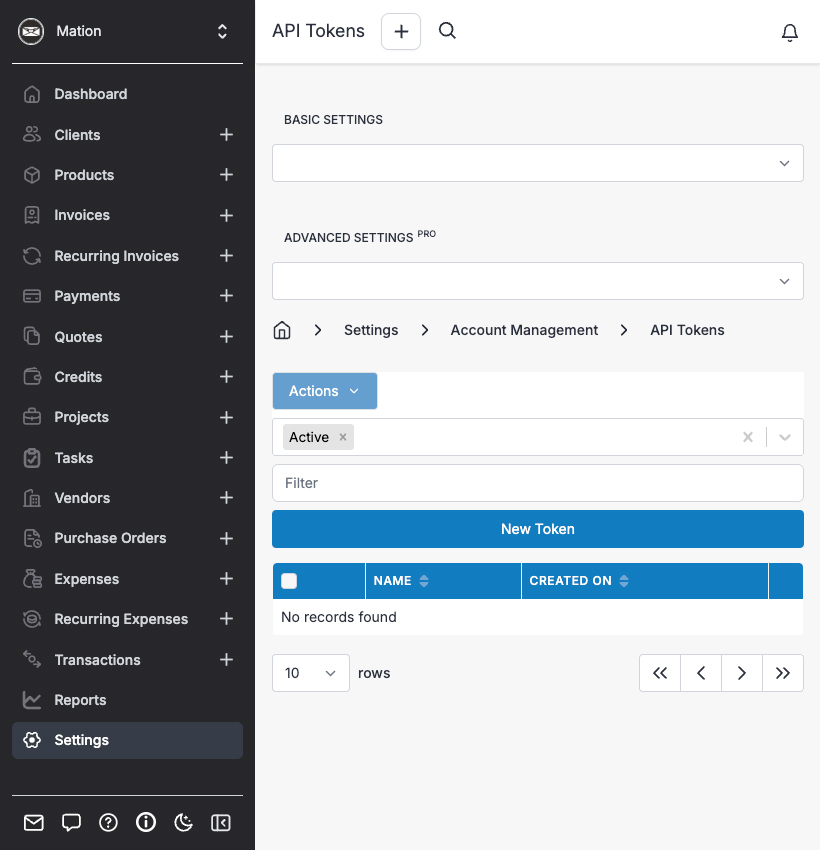
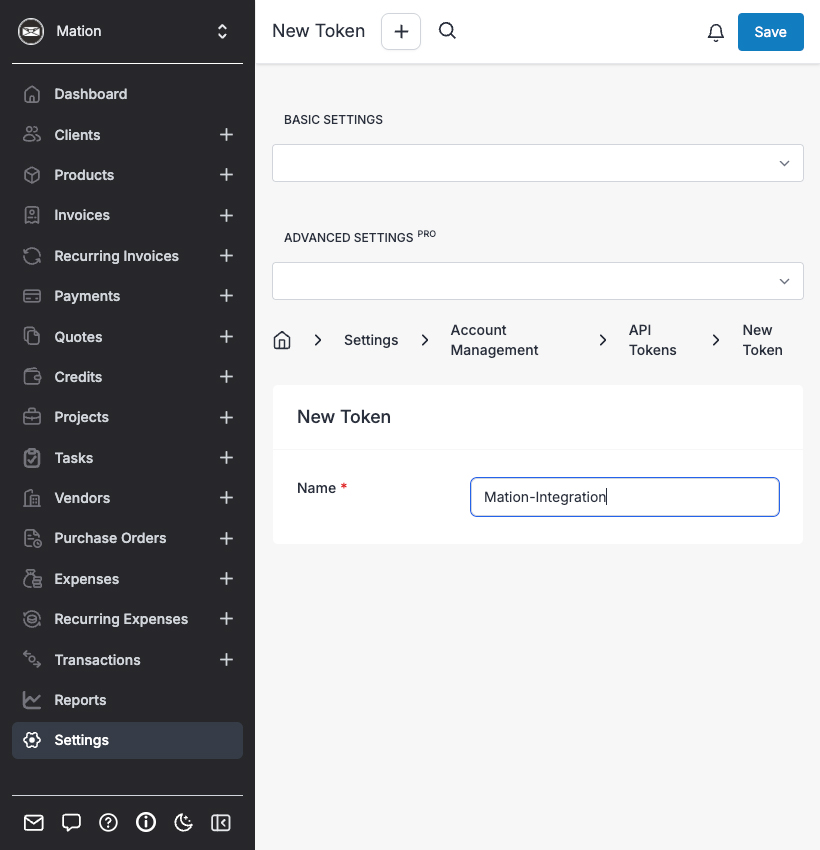
Click the New Token button to create a new API Token.
Enter a name for your New Token. Click the Save button.
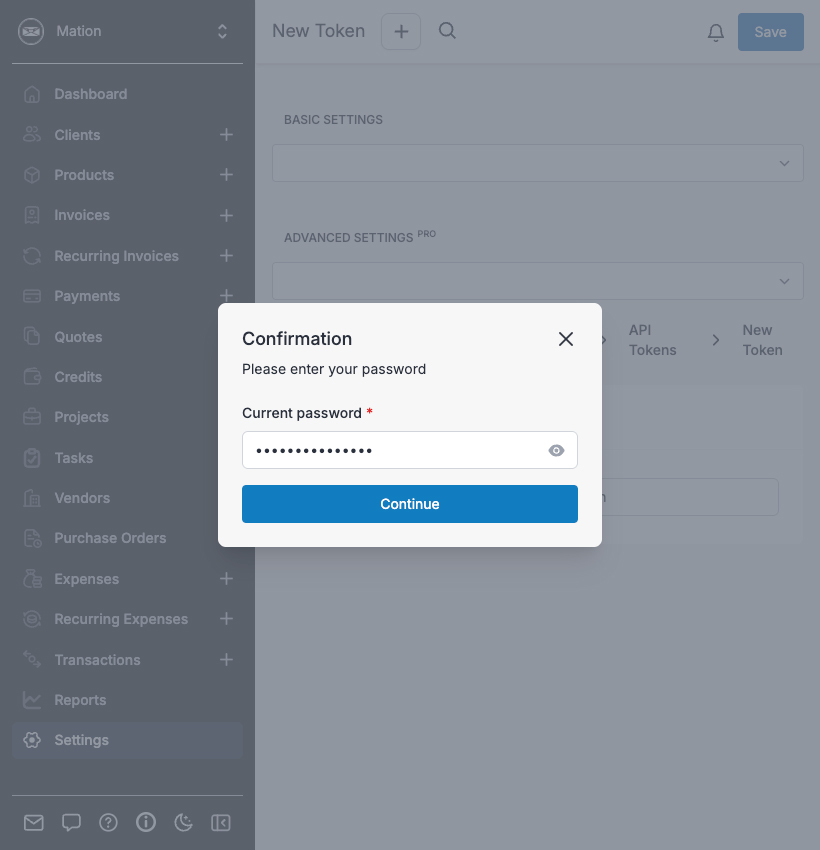
A pop-up appears. Enter your password and click the Continue button.
Your new API Token is active. Copy the
API Token.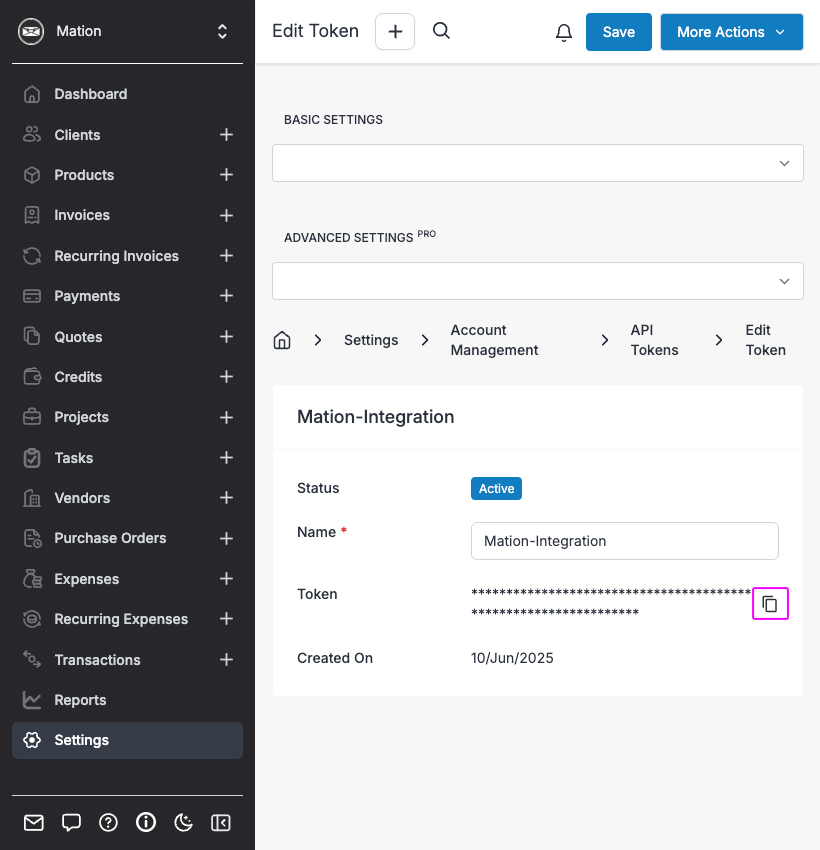
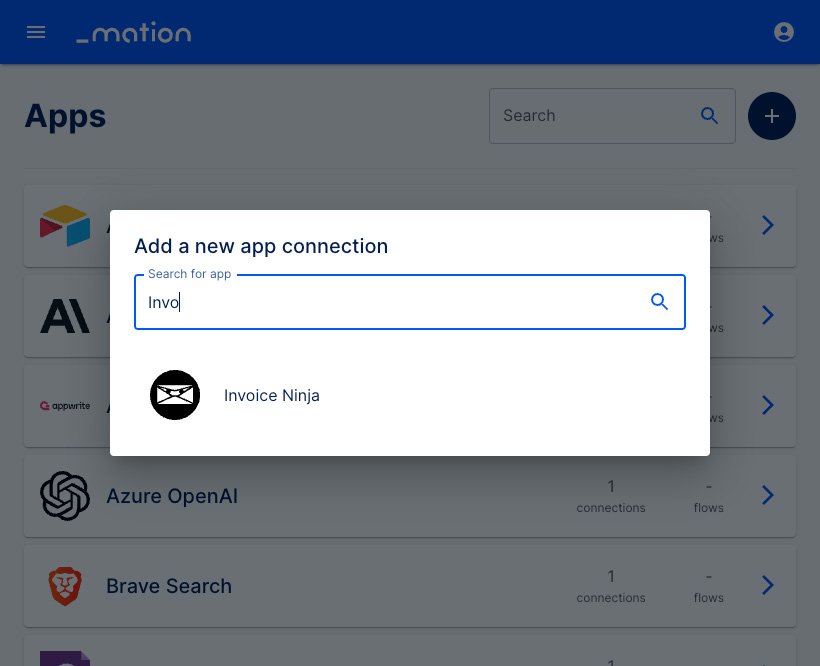
Go to Mation and navigate to Apps. Click the + Add Connection button. In the popup, select Invoice Ninja from the list.
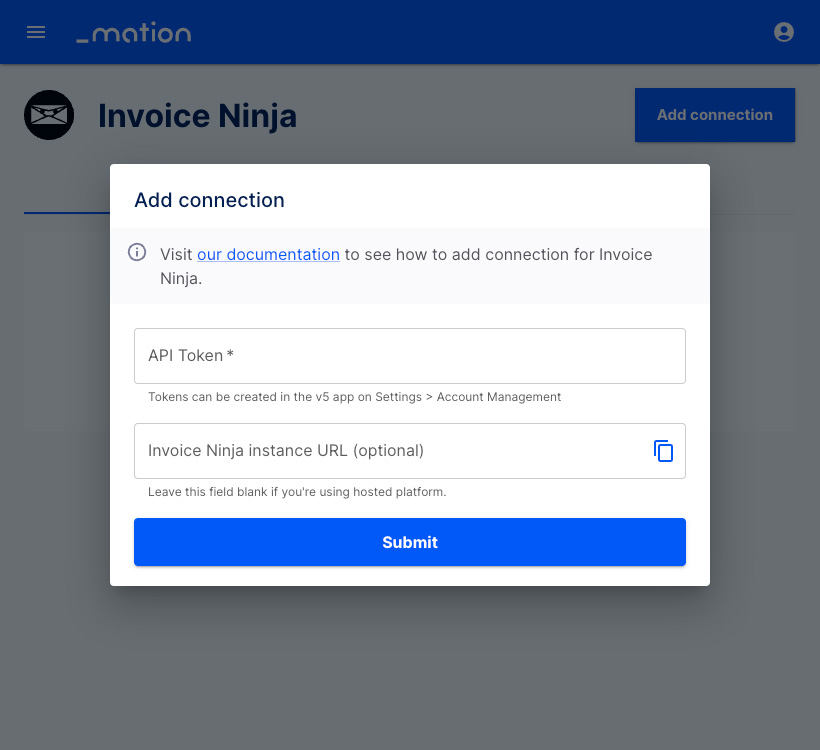
Paste your
API Tokenvalue into the API Token field.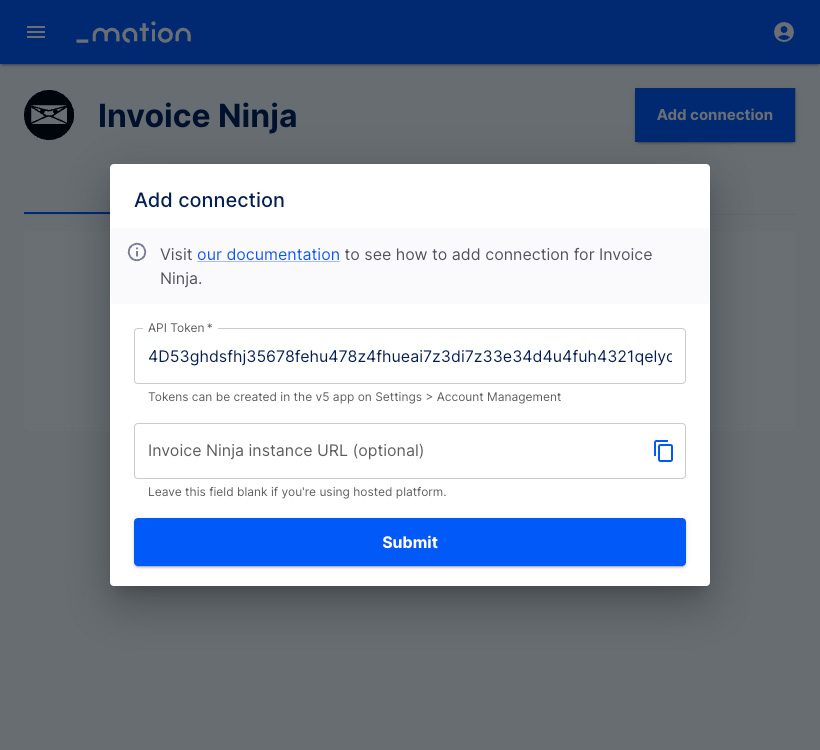
Click the Submit button.
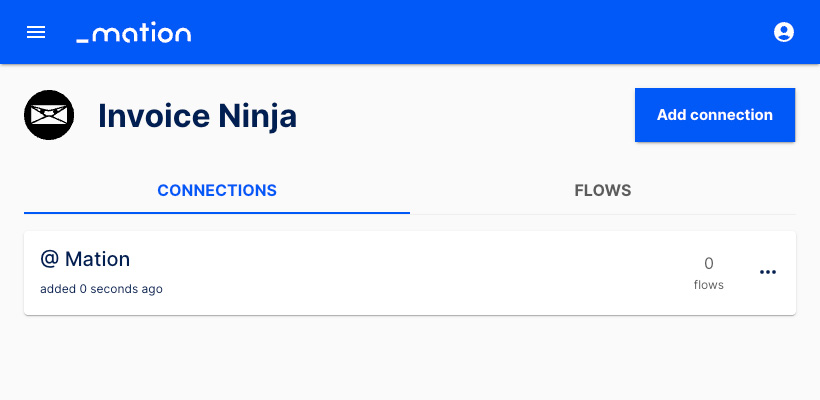
Your Invoice Ninja connection is now established.
Start using your new Invoice Ninja connection with Mation.