Create a flow
Creating flows is easy. The best way to learn how to set up flows is to start with a real use case.
Let's assume we would like to create a flow that fetches new submissions from Typeform and then sends them to a Slack channel.
To perform that task we will use the Typeform and Slack apps. Let's start with creating connections for these apps.
TIP
The easiest way to set up a flow is to connect all involved third-party apps first. Once the connections are established setting up a flow is a piece of cake. Alternatively you may also connect third-party apps while creating a flow, this might appear more complex, though.
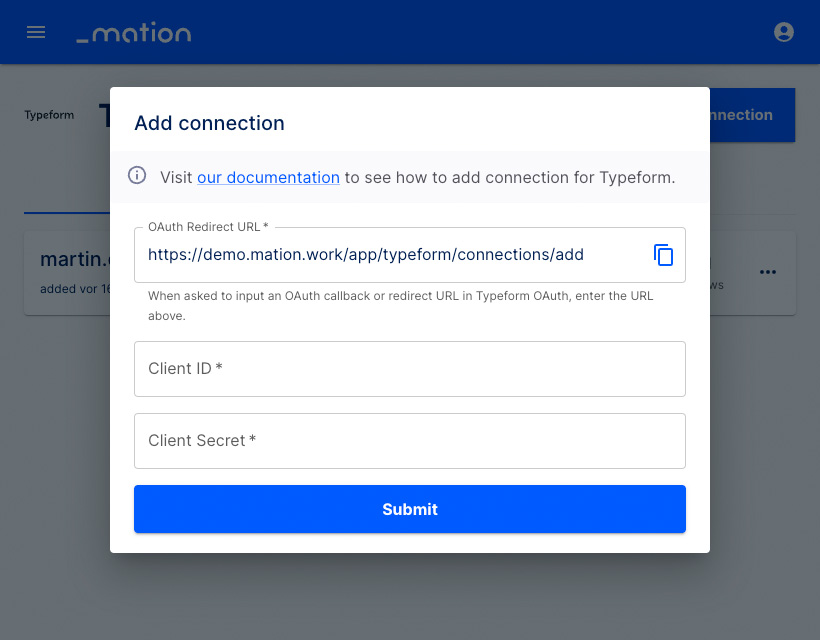
Establish the Typeform connection
Mation provides a detailed user guide to help you connect third-party applications.
Follow these instructions step by step to easily connect Typeform with Mation.
TIP
Whenever you want to create a connection for an app, you may click the our documentation link in the information box to learn how to create a connection step by step for that specific app.
Establish the Slack connection
Mation provides a detailed user guide to help you connect third-party applications. Follow these instructions step by step to easily connect Slack with Mation.
Build the flow
Go to the Flows page on Mation. Click the + button to create a flow.

Name your flow with an appropriate name.
TIP
You may edit your flow name at any time. You don't need to unpublish your flow to rename it.

Choose Typeform as application from the dropdown list.

Choose New entry as the Trigger event from the dropdown list. Click the Continue button.

Choose your connection from the dropdown list. Click the Continue button.

Select your form from the dropdown list to set up the trigger. Click the Continue button.

Click the Test & Continue button to test the Trigger step.

Click the Continue button.

The Action step is now ready for configuration.

Choose Slack as application from the dropdown list.

Choose Send a message to a channel as the Action event from the dropdown list. Click the Continue button.

Choose your connection from the dropdown list.

Choose your Channel from the dropdown list, insert a Message text, choose to either Send as bot or not, and click the Continue button.

Click the Test & Continue button to test the Action step.

Click the Continue button to finish the setup.

Your flow is now configured. Click the Publish button.

If you would like to edit your new flow, click the Unpublish button. Alternatively click the < button in the top left corner of this page to navigate to the Flows page.

Your new flow is ready and running!

TIP
Navigate to Executions in the Mation application sidebar navigation to see your flow at work.
NOTE
Published flows cannot be altered. If you want to change a flow you need to unpublish it first, then make the changes and publish it again.